
Ever had trouble looking for a notebook that fits your exact specifications? Making and binding a book may be the answer to your prayers. A personalized notebook also makes for a great gift for friends and family. Here’s how you can make one for yourself:
Materials
* Paper
* Paper cutter
* Scissors
* Straight-edge ruler
* Paintbrush
* Cover board or binder’s board
* PVA glue or bookbinding glue
* Bookbinding cloth
* Bookbinding needles
* Head material
* Loose weave cotton
* Awl
* Cover paper for book cover design
* Thicker paper for end and starting pages
* Bone folder (optional)
Procedure
1. Gather your paper together. You have the option of leaving them as they are or cutting them further to the size that you prefer, the height that you want and twice the width.
2. Fold each page with the long edge in half, half-hamburger style. Make sure that the edges of the paper are lined up accurately.
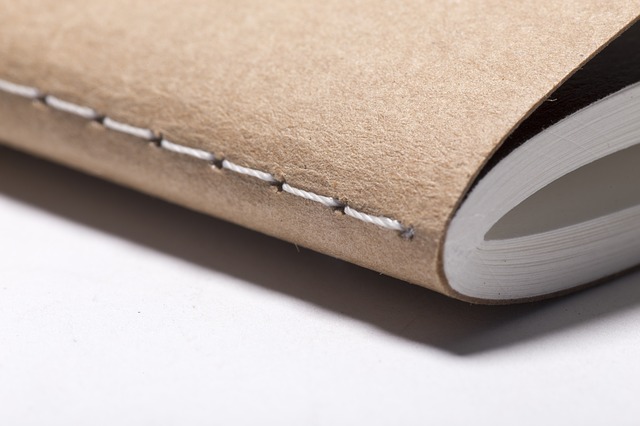
3. Once the pages are folded, collate them into signatures. A signature is like a smaller book, made up of at least seven or at most seven folded papers. The number of pages per signature depends largely on the thickness of each individual paper. The optimum thickness of each signature should be not too thin and not too thick to be able to work with properly.
4. Get your ruler and from the top folded edge of the signature, mark the 1/23 measurement and the 3/43 measurement from the bottom folded edge. Mark the measurements with different colored pens.
5. In between these two measurements, take divide them into three sections and mark them across the spine. This will be where your binding strips will be. You may wish to add more strips if you like, just be sure that they are divided in equal increments.
6. Measure the head material’s width, divide it by half and mark each side of the frame or marking.
7. Use scissors to cut out small triangles from both the head and foot marks.
8. Use the awl to punch through the triangular cuts. Punch them out of the spine, not the page.
9. Thread the bookbinding needle with some waxed thread.
10. Cut the bindings to the thickness of the book or the combined signatures, with an additional inch.
11. Sew the signature for the first end pages. Follow this with the first signature and then so on.
Article Source: http://EzineArticles.com/2257322